How to Automate Video Posting Schedule for Consistent Growth
Learn how to automate video posting schedules to post consistently, batch content, repurpose clips, and grow on TikTok and more platforms.

Estimated reading time: 8 min
Key Takeaways
- Automate your video posting schedule to post more consistently and save time.
- Batch create and repurpose clips from long videos for multiple platforms.
- Use AI tools like Vidulk to generate viral, captioned clips quickly.
- Optimize posting times and metadata for better engagement and growth.
- Manage recurring posts and monitor your publishing workflow efficiently.
Posting consistently is the secret sauce for growing your audience on platforms like TikTok, Instagram Reels, YouTube Shorts, and more. But manually uploading videos every day or week can be tedious and time-consuming. That’s where automating your video posting schedule comes in. In this guide, you’ll learn exactly how to automate video posting schedule so you can post more frequently, batch your content creation, repurpose one video into many clips, and ultimately grow faster with less hassle.
Step 1: Connect Your Social Accounts for Cross-Platform Auto-Posting
First, to automate posting, you need to connect all your social media accounts to a scheduling tool that supports multiple platforms like TikTok, Instagram Reels, YouTube Shorts, Facebook, LinkedIn, and X (formerly Twitter). This lets you set up posts once and have them published everywhere automatically.
Most advanced apps, including Vidulk, allow you to:
- Link your TikTok, Instagram, YouTube, Facebook, LinkedIn, and X accounts in one dashboard.
- Authorize secure API access for auto-publishing without manual intervention.
- Cater to platform-specific requirements like video formats and length limits.
With accounts connected, you’re ready to upload or import your video content.
Step 2: Upload Videos or Connect Your Video Library
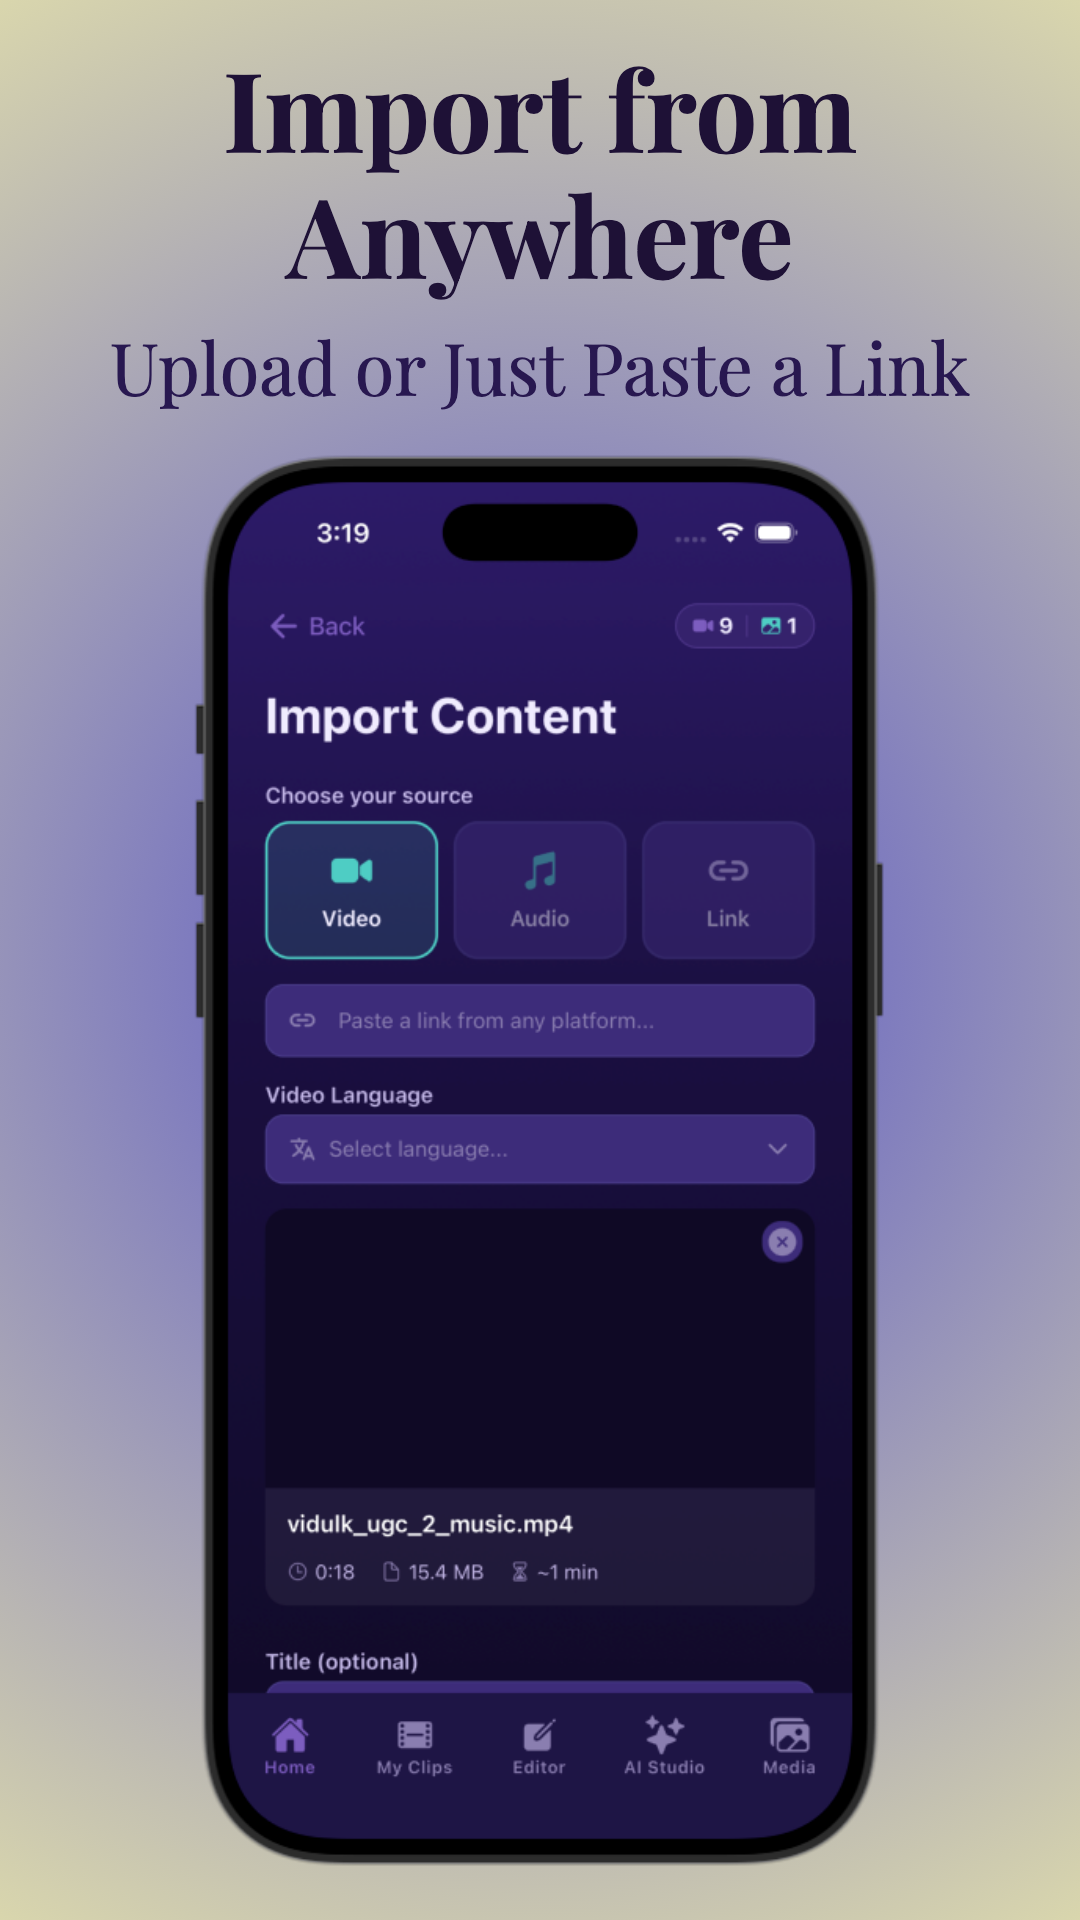
You can start by uploading your finished videos directly or linking to a video library or source. Vidulk’s AI-powered app streamlines this by allowing you to paste a podcast, interview, or any long-format video URL and automatically turning it into short clips ready to post.
Uploading your content upfront is crucial for batch scheduling multiple posts. You can also import from cloud storage or your device’s gallery, keeping all your videos in one place to reuse and repurpose efficiently.
Step 3: Batch Create and Repurpose Clips Using AI
One of the best ways to post more consistently is content batching—creating many pieces of content in one session. Use AI video clipping tools like Vidulk to repurpose long videos into multiple viral short clips with captions and vertical formatting optimized for platforms like TikTok and Instagram Reels.
This process helps you:
- Extract the best moments automatically without manual editing.
- Generate multiple clips from a single source video, maximizing reach.
- Ensure clips are formatted correctly with captions and thumbnails.
Repurposing one video into many clips increases your content output exponentially, which is key to growing on TikTok and other video platforms.
Step 4: Choose Platforms, Formats, and Customize Metadata
Next, select which platforms each clip will be posted to and specify the correct video format (vertical, horizontal, length limits). Vidulk and similar tools allow you to tailor metadata such as:
- Titles and captions—add hooks and keywords to attract viewers.
- Descriptions and hashtags—to improve discoverability and engagement.
- Thumbnails—for eye-catching visuals that increase click-through rates.
Optimizing these details before scheduling boosts your chances of going viral and growing faster.
Step 5: Set Publish Dates, Times, and Timezones
Scheduling posts is more than picking dates. To automate video posting effectively:
- Set the publish date and exact time for each post according to your audience’s peak activity hours.
- Specify timezones if you’re targeting multiple regions.
- Plan your posting cadence to maintain consistent intervals, such as daily or several times a week.
Many scheduling tools offer recommendations on the best times to post based on analytics, helping you optimize engagement.
Step 6: Use an Automation Calendar or Queue for Batch Scheduling
To keep your content flow organized, use an automation calendar or queue feature. This lets you batch schedule all your clips in advance, visualize your publishing timeline, and manage recurring posts if needed.
Key benefits include:
- Seeing your upcoming posts at a glance to avoid overlaps or gaps.
- Easily adjusting schedules by dragging and dropping posts on the calendar.
- Setting repeat intervals for recurring videos or series.
This structured approach streamlines your content creation workflow and ensures you never miss posting consistently.
Step 7: Choose Auto-Publish vs. Manual Approval Workflows
Depending on your comfort level, you can opt for fully automatic publishing where clips go live exactly as scheduled or a manual approval workflow where you review each post before it goes out.
Auto-publish saves time and keeps a steady flow, ideal if you trust your metadata and clips. Manual approval adds quality control, useful if you want to tweak captions or thumbnails last-minute.
Step 8: Monitor Scheduled Posts, Limits & Failure Handling
Automation doesn’t mean set-and-forget. Use your dashboard to:
- Track all scheduled posts and their statuses (pending, published, failed).
- Monitor posting limits imposed by platforms to avoid account restrictions.
- Receive alerts and retry options for failed posts.
Regular monitoring ensures your automated video posting schedule runs smoothly and your audience stays engaged.
Tips & Common Mistakes
To get the most from automating your video posting schedule, keep in mind:
- Tip: Focus on creating high-quality clips that tell a story or solve a problem—this increases virality chances.
- Tip: Use Vidulk’s AI tools for captioning and format optimization to save editing time.
- Mistake: Don’t post too frequently without a solid content plan—it can overwhelm your audience.
- Mistake: Avoid generic metadata; customize captions and hashtags for each platform.
- Mistake: Neglecting to monitor your schedule can lead to missed posts or repeated failures.
Conclusion
Learning how to automate video posting schedule empowers you to post more consistently, batch your content creation, and repurpose long videos into viral clips easily. Using tools like Vidulk, you can streamline your content creation workflow, optimize your posting cadence, and grow faster on TikTok, Instagram, YouTube, and other platforms.
By connecting your social accounts, uploading or importing videos, batching clips with AI, customizing metadata, scheduling smartly, and monitoring your dashboard, you’ll build an efficient system that keeps your audience engaged and your channel thriving.
FAQ
How do I schedule videos to post automatically on multiple social media platforms?
Connect all your social media accounts to a scheduling tool like Vidulk, upload or import your videos, customize metadata, then set publish dates and times. The tool auto-posts clips to each platform per your schedule.
What is the best time to schedule video posts for engagement?
The best time varies by audience, but many tools offer analytics and recommendations based on when your followers are most active. Generally, posting during early evening or lunch breaks tends to boost engagement.
Can I auto-post YouTube Shorts, TikTok, and Instagram Reels from one tool?
Yes, platforms like Vidulk support auto-posting to multiple destinations including YouTube Shorts, TikTok, and Instagram Reels with proper video formatting and metadata customization.
Do I need to upload the video first before scheduling it?
Yes, uploading or importing your video into the scheduling app is necessary to batch schedule posts. Some tools also allow linking to external video libraries for easy access.
How do I set a posting schedule for videos in bulk?
Use an automation calendar or queue feature to batch schedule multiple videos at once, setting dates, times, and recurring intervals to maintain consistent posting.
How do I automate video posting without manual publishing each time?
Enable auto-publish mode in your scheduling tool to have videos posted automatically at the scheduled time without manual intervention. Alternatively, use manual approval if you want to review posts before publishing.