How to Clip Discord Video Calls: Step-by-Step Guide & Tools
Learn how to clip Discord video calls, edit, and share highlights—using Discord's native tools, third-party apps, and AI-powered solutions like Vidulk.

Estimated reading time: 15 min
Key Takeaways
- Clipping Discord video calls is possible with built-in features and third-party tools.
- Default and custom keybinds streamline the clipping process (Alt+C by default).
- Clips have length limits (up to 2 minutes) and can be edited before sharing.
- Third-party solutions like Vidulk and Medal.tv offer advanced editing and AI-powered clipping.
- Permissions, etiquette, and feature availability vary—always respect privacy and check settings.
Table of Contents
- Section 1: Enabling and Accessing Discord Clips
- Section 2: Keybinds and Shortcuts for Clipping
- Section 3: Creating Clips During Video Calls and Streams
- Section 4: Editing, Managing, and Sharing Discord Clips
- Section 5: Using Third-Party Tools for Discord Video Call Clipping
- Section 6: Permissions, Etiquette, and Limitations
- Conclusion
- FAQ
Section 1: Enabling and Accessing Discord Clips
Finding the Clips Feature in Discord
Discord has gradually rolled out its Clips feature, allowing users to capture and share highlights from streams and calls. To start clipping Discord video calls, you first need to ensure the feature is enabled in your user settings. If you're a Nitro subscriber, Clips are generally available. Some non-Nitro users may see Clips as part of experimental feature releases.
- Open Discord and click the gear icon in the lower-left to access User Settings.
- Look for the Clips section in the left sidebar menu. If it's not visible, the feature may not be enabled for your account yet.
- Toggle Enable Clips on to activate the feature.
If you don't see the Clips section, ensure your Discord client is updated to the latest version. The feature may still be rolling out—check back periodically or watch for official announcements from Discord.
Additionally, keep in mind that the Clips feature may differ slightly depending on whether you're using the desktop app, browser version, or mobile app. On desktop, the rollout is typically faster and more robust. On mobile, Clips may appear in a later update or only as a limited feature for some users. Always check for updates in your app store or desktop client settings to maximize your chance of gaining access.
Clips Availability: Who Can Use It?
The Clips feature is primarily available to Nitro subscribers. However, Discord sometimes enables Clips for select users as part of A/B testing. Server administrators may also need to enable Clips in server settings for member access.
- Nitro Users: Full access to Clips in eligible servers and DMs.
- Non-Nitro Users: Experimental access only; feature may not appear.
- Server Admins: Can allow or restrict Clips in their servers.
For example, if you are a server admin and want to allow members to clip streams or calls, you must go to Server Settings > Integrations > Clips and ensure the feature is toggled on. You can also set permissions per role or channel, giving you granular control over who can create and view Clips within your community. This is particularly valuable for managing privacy in large servers with hundreds or thousands of users.
For more on integrating video chat features into your workflow, see How to Integrate Video Chat API for Seamless Content Creation.
Accessing Your Clips Library
Once Clips are enabled, you can access your saved clips:
- Via your Discord profile under the Clips tab.
- Directly from a server channel's Clips section, if available.
This centralized library makes it easy to review, edit, and share your best Discord moments.
The Clips library is organized by creation date, showing thumbnails and metadata such as the original stream/call, duration, and participants involved. You can search for clips by keyword or filter by server/channel. This is helpful if you frequently clip content across multiple communities or want to revisit highlights from specific events.
Note that storage for clips is not unlimited. Depending on your Nitro plan and server settings, Discord may retain clips for a fixed duration (e.g., 30 days) before automatically deleting them. You can always download important clips to your device for permanent archiving.
Section 2: Keybinds and Shortcuts for Clipping
Default Keybinds for Making Clips
Discord streamlines the clipping process with built-in shortcuts. The default keybind to create a clip is usually Alt+C (on Windows), but this may vary by platform or user customization.
- During a stream or video call, press Alt+C to capture the last moments as a clip.
- The duration of the clip will depend on your Clips settings (up to 2 minutes).
If Alt+C does not work, check your keybinds:
- Go to User Settings > Keybinds.
- Look for the action labeled Start/Stop Clip and adjust the shortcut if needed.
Mac users may find the default keybind is Option+C or another combination. On mobile, keybinds are not available, but you can clip using on-screen controls if the feature is enabled.
Customizing Keybinds
You can assign a custom shortcut to fit your workflow or avoid conflicts with other apps. Simply add a new keybind in the settings and select your preferred combination.
- Click Add a Keybind.
- Choose Start/Stop Clip as the action.
- Press your desired keys (e.g., Ctrl+Shift+C).
Custom keybinds are especially useful if you frequently make clips while multitasking or gaming.
For instance, if you're streaming a game and frequently use Alt or Ctrl for in-game functions, you might set your clip keybind to a less-used combination (e.g., F12 or Shift+Alt+X) to prevent accidental activation or interference with game controls. Remember to test your custom keybinds during a dry run to ensure they work as intended.
Clip Length and Buffer Settings
By default, Discord clips can record up to 2 minutes of footage. You can adjust this in the Clips settings:
- Find the Clip Duration slider or option in the Clips section.
- Choose from preset lengths (e.g., 15 seconds, 30 seconds, 1 minute, 2 minutes).
Remember that longer clips take up more storage and may be slower to process or share.
The actual buffer—meaning the amount of time Discord "remembers" for possible clipping—is continuously rolling, so when you trigger a clip, Discord instantly grabs the previous X seconds or minutes, depending on your setting. If you routinely want to catch spontaneous moments (like a sudden joke or game-winning play), set your buffer to 1 or 2 minutes. For more curated content, a shorter buffer (15 or 30 seconds) can help keep clips focused and manageable.
Section 3: Creating Clips During Video Calls and Streams
Clipping in Streams vs. Voice/Video Calls
Discord Clips work in both server streams and group voice/video calls, but there are some differences:
- Streams: Clips can capture both video and audio from the stream, making it ideal for gaming highlights or live events.
- Video Calls: Clips record the active call window, including all visible participants and shared screens.
- Voice Calls (no video): Clips capture audio only, useful for podcast-style conversations or interviews.
For example, in a gaming server, if someone pulls off a clutch play during a stream, pressing your clip keybind preserves the last moments of action, including the audio reactions of everyone in the channel. In a group video call, you could clip a funny face, a memorable announcement, or a critical discussion by pressing the shortcut as soon as it happens. In audio-only calls, capturing clips can help preserve key moments in a group discussion or remote podcast recording.
Steps to Clip During a Call
To create a clip during a Discord video call:
- Join or start a video call in a DM, group, or server channel.
- When you want to capture a moment, press Alt+C (or your custom keybind).
- Discord saves the last 15 seconds to 2 minutes as a clip, depending on your settings.
- A notification will confirm the clip is ready to edit or share.
The notification typically appears as a banner or pop-up in the Discord window, allowing you to click directly into the editor or continue your call uninterrupted. If you miss the notification, you can always find the clip in your Clips library after the call.
Tips for Effective Clipping
- Plan ahead: Set your clip duration before the call starts.
- Be mindful of privacy: Let participants know if you plan to record or clip the call.
- Use in moderation: Frequent clipping can distract from the conversation.
Some creators recommend keeping a notepad or timestamp log for particularly important moments during longer calls or streams. This helps you quickly find and clip the best parts after the session. For calls that may become public, such as Q&A sessions, interviews, or co-working events, announcing at the start that the call is being clipped fosters transparency and avoids misunderstandings.
For creators aiming to turn long Discord calls into viral content, consider using AI-powered apps like Vidulk which can automate the process and add captions for social media.
Section 4: Editing, Managing, and Sharing Discord Clips
Editing Your Clips
After capturing a clip, Discord gives you basic editing tools before saving or sharing:
- Trim: Adjust the start and end points to highlight the best moments.
- Audio Selection: Toggle between stream audio, participant audio, or both.
- Add a Title: Give your clip a descriptive or catchy name.
The trim tool is especially useful for eliminating awkward transitions, silences, or irrelevant sections from your clips. For example, if you captured a 2-minute segment but only want the 30 seconds where a key discussion occurred, simply drag the trim sliders to select that range. The audio selection lets you decide whether to include just the main speaker, all participants, or background game audio—critical for tailoring content to different audiences.
For advanced editing—such as adding captions, custom layouts, or AI enhancements—export your clip and use a tool like Vidulk. Vidulk's AI Studio can detect highlights, auto-caption, and reformat clips for vertical, short-form platforms.
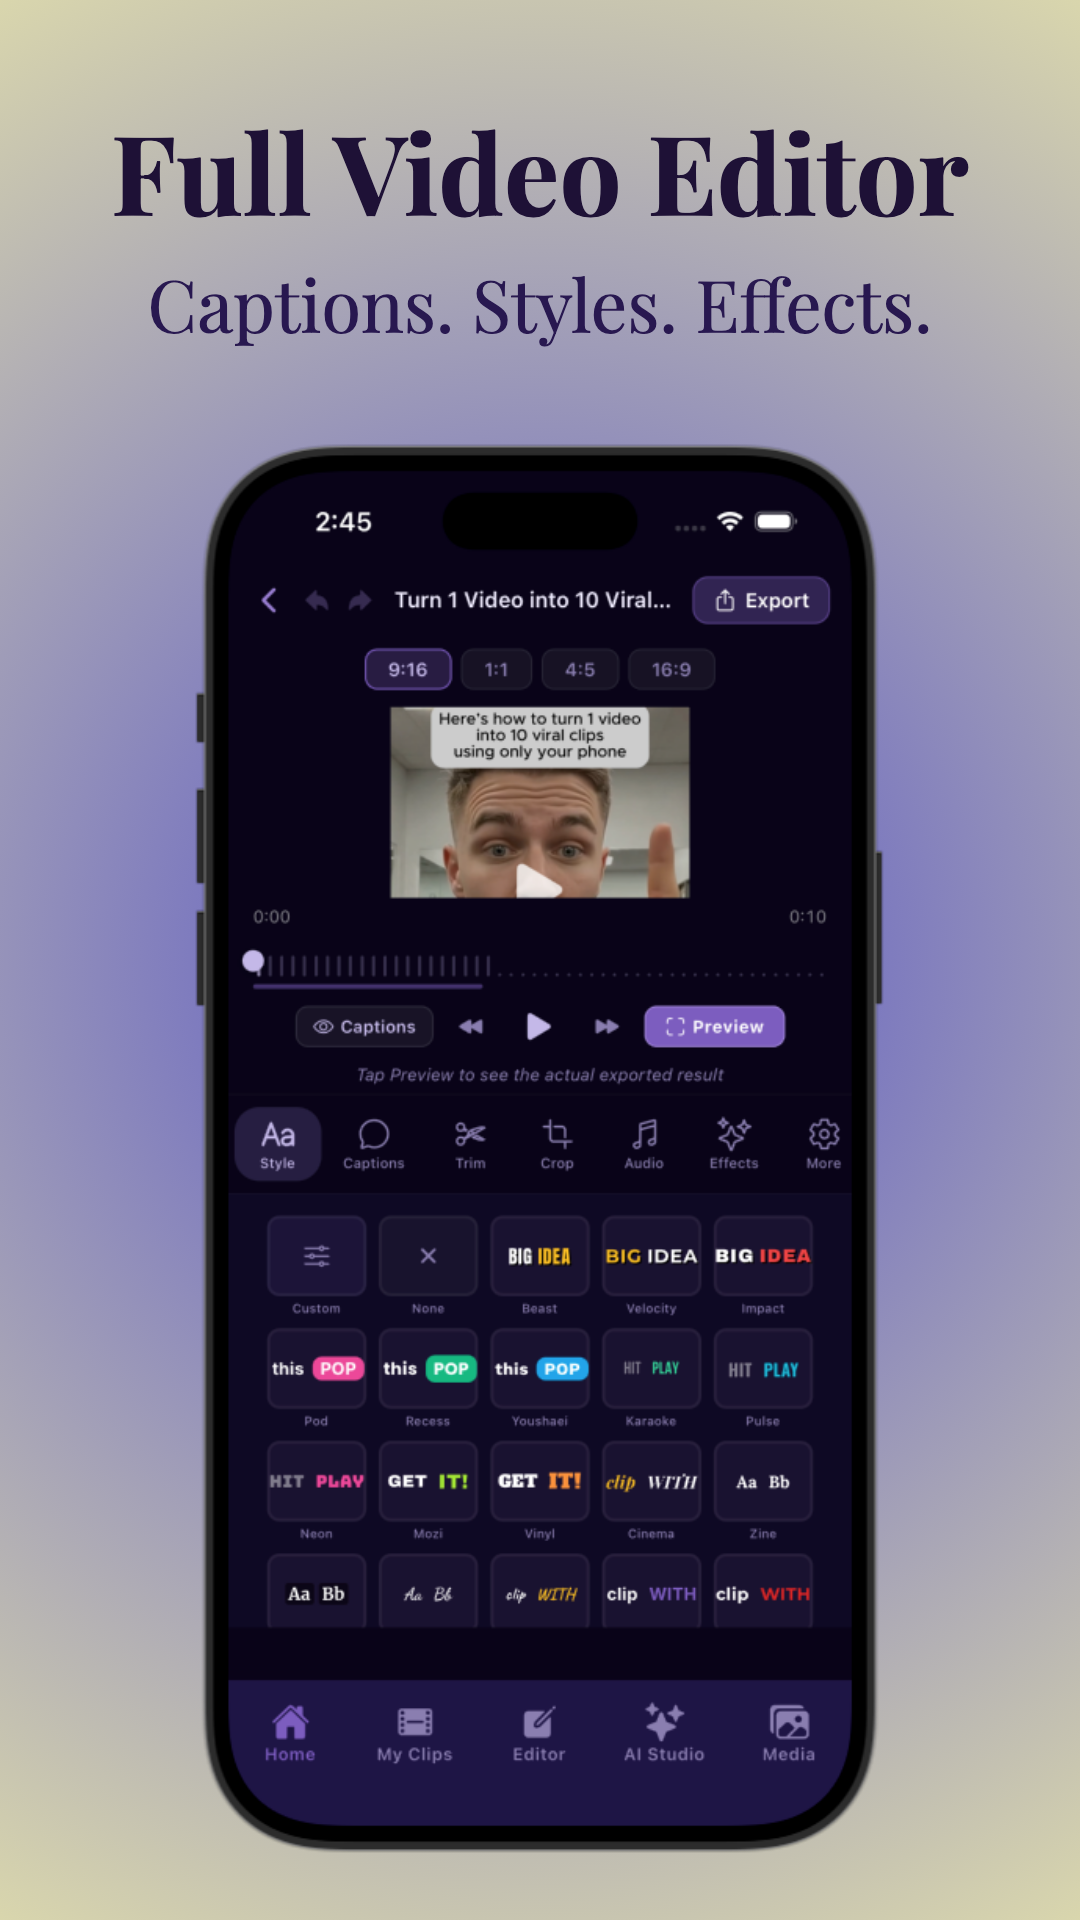
Vidulk makes it easy to add branded overlays, animated subtitles, and emojis to your clips, increasing engagement and accessibility on social platforms. The AI can also suggest which moments are most likely to go viral, saving you hours of manual review.
Managing Your Clip Library
All your saved clips are accessible from your profile or the server's Clips tab. Here you can:
- Review: Watch or listen to your clips.
- Edit: Make further adjustments if needed.
- Delete: Remove old or unwanted clips to free up space.
Clips are usually stored for a set period (e.g., 30 days) unless you download them.
You can also organize your clips by tagging them with keywords, adding descriptions, or creating folders for different projects (such as "Podcast Highlights," "Game Wins," or "Funny Moments"). This is helpful for content creators managing multiple communities or planning regular social media uploads. If you're working with a team, you can share folders or specific clips with collaborators for feedback before publishing.
Sharing and Downloading Clips
- In Chat: Share clips directly in Discord channels, DMs, or group chats.
- Mark as Spoiler: Hide the preview and require a click to reveal, useful for sensitive content.
- Download: Save the clip to your device for uploading elsewhere.
When sharing in Discord, you can add a message, tag friends, or use emojis to highlight the moment. The "Mark as Spoiler" feature is particularly helpful for content that may contain surprises, plot points, or anything not safe for work (NSFW).
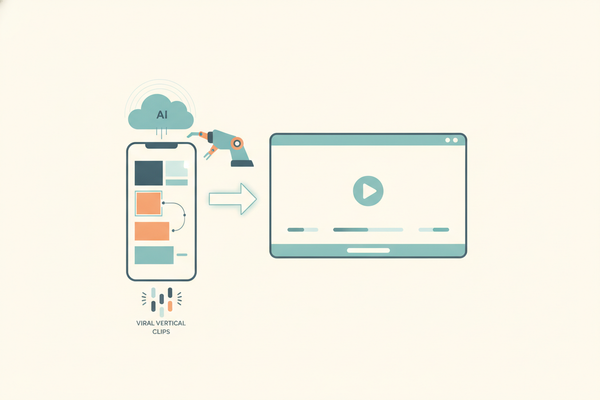
Exporting for Social Media: If you plan to post your clips to TikTok, Instagram, or YouTube Shorts, it's best to download the clip and process it through an editor like Vidulk. Vidulk automatically reformats horizontal clips to vertical, adds animated captions, and optimizes for platform-specific requirements (such as TikTok's 9:16 ratio and 60s/90s limits). This increases the likelihood your content will perform well and reach a wider audience.
For exporting clips to TikTok, Instagram, or YouTube Shorts, Vidulk's AI tools help reformat and enhance your content for maximum reach. Learn more about turning long videos into viral shorts in the guide AI Clip Generator: Transform Long Videos Into Viral Shorts.
Section 5: Using Third-Party Tools for Discord Video Call Clipping
Why Use Third-Party Tools?
If Discord Clips are unavailable to you, or you need more advanced features, several third-party tools can help you clip Discord video calls. These tools often offer broader compatibility, higher quality, or AI-powered automation.
For example, if you host a weekly podcast or want to automatically extract the most engaging moments from an hours-long gaming session, native Discord Clips may be too limited in duration or editing features. Third-party tools fill this gap with instant replay, batch editing, and integration with social media platforms.
Popular Clipping Tools for Discord
- Medal.tv: Records your screen and audio. Supports hotkey clipping, editing, and instant sharing. Works for Discord, games, and more.
- Xbox Game Bar (Windows): Built-in tool for screen and audio recording. Use Win+Alt+G to capture the last 30 seconds of any window, including Discord.
- Audacity: For audio-only capture. Useful for podcast calls or interviews.
- SurFlex: Advanced desktop recorder with real-time clipping and overlays.
- Vidulk: AI-based mobile app for automatic highlight detection, captioning, and vertical short creation from long videos or audio.
Each of these tools comes with its own workflow. For example, Medal.tv can run in the background and auto-detect when you're in a Discord call, saving clips with a single hotkey press. Xbox Game Bar integrates with Windows 10 and 11, letting you capture Discord content even if Discord Clips are not enabled. Audacity is a lightweight solution for those who only need audio.
Using Vidulk for Discord Video Call Clips
- Step 1: Download your Discord video call recording or screen capture.
- Step 2: Open Vidulk and upload the file or paste a link.
- Step 3: Let Vidulk's AI analyze the video and suggest the best clips.
- Step 4: Customize captions, trim, and export as vertical, social-ready clips.
Vidulk is especially useful for creators who want to repurpose long-form Discord content into short-form videos that perform well on social media. The AI scans for highlights based on voice tone, audience engagement, and keywords, then presents a set of suggested clips. You can accept, edit, or merge these suggestions to create a polished final product.
For a detailed walkthrough, check out AI Video Clip Generator: Transform Long Videos with AI.
Always review third-party app permissions and ensure you have consent to record or clip calls. Some tools require "window capture" or "microphone access" permissions, and the use of these features should be disclosed to all participants.
Section 6: Permissions, Etiquette, and Limitations
Respecting Privacy and Consent
- Always inform participants before recording or clipping a Discord call or stream.
- Many regions have laws requiring all-party consent for recording conversations.
- Server admins may restrict or prohibit clips in their communities.
Failure to obtain consent can result in disciplinary action from Discord or even legal consequences. Use Clips responsibly and ethically.
For added transparency, consider adding a disclaimer to your server or group call—such as "This call may be clipped and shared for social content"—in the channel topic or pinned messages. This helps set expectations and avoids confusion. If someone objects, respect their wishes and exclude their participation from the clips.
Limitations of Discord's Native Clipping
- Feature rollout: Not available to all users; Nitro subscription may be required.
- Clip duration: Maximum of 2 minutes per clip; not suitable for long-form content.
- Editing: Basic tools only; advanced editing requires export and third-party apps.
- File size and format: Limits on maximum file size and supported formats.
In practice, this means that if you want to create a 10-minute highlight reel, you'll need to record multiple clips and stitch them together in an external editor. Discord's native solution is ideal for spontaneous, short moments rather than in-depth content production. Additionally, some servers may disable clipping entirely to maintain privacy or preserve bandwidth.
Best Practices for Sharing Clips
- Use spoiler tags for sensitive or surprising content.
- Avoid sharing clips outside the original context without permission.
- Credit all participants and respect community guidelines on sharing media.
When posting clips on social media, tag participants if they consent and include context for viewers. Never share clips that embarrass or misrepresent others. If your clip contains copyrighted music or third-party content, double-check platform rules to avoid takedowns or demonetization.
For a step-by-step process on making AI-powered video clips, see How to Make AI Video Clips: A Step-by-Step Guide.
Conclusion
Clipping Discord video calls is easier than ever with Discord's built-in Clips feature and robust third-party apps. Whether you're capturing epic stream moments, saving highlights from a group call, or creating social media-ready shorts, the right tools and ethical practices are key. For creators who want to automate, enhance, and share the very best moments, AI apps like Vidulk streamline the entire process—just upload, let AI detect the highlights, and post viral, captioned clips in minutes.
Remember to always respect privacy and get consent before recording or sharing any conversation. With the right workflow, you can easily elevate your content and maximize your reach across platforms.
FAQ
Q: Can I clip Discord voice calls without Nitro?
A: Most users need Discord Nitro to access the Clips feature, but some non-Nitro users may receive access as part of experimental rollouts. Otherwise, you can use third-party tools like Medal.tv, Xbox Game Bar, or Vidulk to record and clip calls.
Q: What is the default shortcut to clip on Discord?
A: The default shortcut to start a clip on Discord is Alt+C on Windows. You can customize this keybind in User Settings under the Keybinds section.
Q: Why am I not seeing the Clips option in Discord settings?
A: The Clips feature is rolling out gradually and may not be available to all users. Make sure your Discord app is updated and check if you're eligible as a Nitro subscriber or participant in Discord's experimental features.
Q: How long can a Discord clip be?
A: Discord clips can be up to 2 minutes in length. You can choose shorter durations (15s, 30s, 1min) in the Clips settings.
Q: How do I edit a Discord clip after recording it?
A: After recording, you can trim the clip, adjust audio sources, and add a title in Discord's built-in editor. For advanced edits like captions or vertical formatting, export the clip and use a tool like Vidulk.
Q: Can I record Discord calls with Medal.tv or Xbox Game Bar?
A: Yes. Medal.tv and Xbox Game Bar can record your screen and audio, allowing you to capture and clip Discord calls even if you don't have access to Discord's native Clips feature.
Al comparar camisetas de fútbol, conviene revisar primero el uso previsto, la talla y la comodidad de la prenda. Si la búsqueda se centra en una figura concreta, equipacion de Lionel Messi conserva esa referencia sin mezclar equipos o selecciones. Revisar estos puntos reduce confusiones entre preferencias de uso, comodidad y cuidado de la prenda.