How to Clip Zoom Recording: Turn Meetings Into Viral Clips
Learn how to clip Zoom recordings, make meeting highlights, and create viral clips from webinars and Google Meet. Step-by-step guide for creators.

Estimated reading time: 14 min
Key Takeaways
- Clip Zoom recording files easily using built-in and AI-powered tools for viral content.
- Turn Zoom, webinar, and Google Meet recordings into short, shareable highlights.
- AI features help find the best moments and speed up the clipping process.
- Customize, batch-edit, and share clips with passcodes and expiry dates.
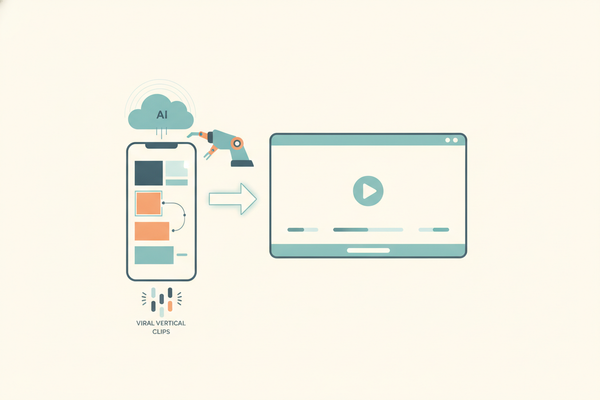
- Vidulk automates viral clip creation from any long video, including meetings and podcasts.
Table of Contents
- Section 1: Why Clip Zoom Recordings?
- Section 2: Trimming Zoom Recordings—Start, End, and More
- Section 3: Creating Clips with Zoom AI Companion
- Section 4: Editing and Customizing Your Zoom Clips
- Section 5: Saving, Managing, and Deleting Zoom Clips
- Section 6: Sharing and Repurposing Zoom and Webinar Clips
- Conclusion
- FAQ
Section 1: Why Clip Zoom Recordings?
Unlocking Value from Long-Form Meetings
Every day, countless hours of knowledge and insights are captured in Zoom meetings, webinars, and online interviews. But only a fraction of these recordings are ever revisited. Clipping your Zoom recording—extracting the most valuable highlights—turns dense meeting files into bite-sized, shareable content.
- Faster consumption: Clips let viewers access key points in seconds, rather than watching a full hour-long recording. For example, a 60-minute meeting might contain only 4-5 truly valuable highlights, each just 1-2 minutes long.
- Repurpose for social media: Short vertical clips are perfect for LinkedIn, Twitter, or TikTok. Many platforms favor content that is under 90 seconds, and vertical (9:16) videos tend to perform best on mobile feeds.
- Cross-platform reach: Podcast interviews, webinars, and Google Meet highlight clips can be reused across channels. One meeting recording can fuel dozens of posts, from quick tips on Instagram Reels to extended highlight reels on YouTube.
Who Needs Zoom Recording Clips?
Clipping Zoom recordings isn't just for marketers. Here are a few use cases:
- Educators: Share lecture highlights and explanations. For instance, a mathematics professor might extract a concise 3-minute explanation of a key formula to share with students for revision.
- Sales teams: Showcase winning pitches or customer testimonials. Short customer statements can be used in email campaigns or on landing pages.
- HR and training: Onboard new team members with concise process videos. Instead of asking new hires to watch entire onboarding sessions, HR can share 2-minute how-tos extracted from longer calls.
- Content creators: Transform webinars to clips or turn podcast interviews into viral shorts. A 90-minute webinar can yield a series of engaging, platform-optimized highlights for different audience segments.
How AI Supercharges Clipping
Manual editing is tedious. Modern AI video clipping tools—like Vidulk—can automatically detect key moments, generate captions, and export vertical clips, saving you hours per week. For example, Vidulk uses AI to scan for emotionally charged moments, changes in speaker tone, or audience reactions, ensuring the chosen clips are both relevant and engaging. For more on this, check out the AI Clip Generator guide.
Many AI tools allow you to specify criteria—such as speaker name, keyword, or topic—so you can quickly locate and extract highlights. This is especially useful when dealing with recordings that span over an hour and include multiple speakers or topics.
Section 2: Trimming Zoom Recordings—Start, End, and More
Using the Zoom Scissors/Trim Tool
Zoom offers a built-in trim tool for cloud recordings. After your meeting ends and the recording is processed:
- Go to zoom.us and sign in.
- Navigate to Recordings > Cloud Recordings.
- Select the recording you want to edit.
- Click the scissors icon at the lower right of the playback bar.
- Drag the handles to set new start and end times. For example, trim out the first 5 minutes of pre-meeting chatter or the final 10 minutes of Q&A if they're not needed.
- Save changes to trim the Zoom recording. The trimmed version is available for playback and sharing, but the original file remains intact for compliance or future use.
Note: This tool only trims the beginning and end, not the middle. For advanced editing (like removing a segment in the middle), export and use another editor or AI tool.
Limitations and Best Practices
- Trimming is non-destructive: The original file remains intact; trims affect playback. This ensures compliance and allows you to re-edit the clip if needed later.
- Cannot trim in the middle: For more detailed edits, download and use third-party editors (like iMovie, Adobe Premiere Rush, or DaVinci Resolve) or AI solutions such as Vidulk that allow for advanced segment removal and montage creation.
- Resolution and format: Trimming in Zoom preserves the source quality and maintains the original .mp4 format, ensuring compatibility with most video platforms.
Turning Webinars Into Clips
Webinars often run long and contain multiple moments worth sharing. Use the trim tool to cut unneeded intros/outros, then follow up with advanced clipping to extract key highlights. For example, after trimming an hour-long webinar down to the most relevant 45 minutes, you can then break this content into 5-10 short clips, each focusing on a specific tip, demo, or customer story. For a deeper workflow, see how to use AI to transform long videos into shorts.
As a best practice, always review your trimmed clips for context. Ensure that each clip includes enough introduction so viewers understand what’s being discussed, but is concise enough to remain engaging.
Section 3: Creating Clips with Zoom AI Companion
Zoom Clips vs. Zoom Cloud Recording Clips
Zoom offers two major ways to turn meetings into clips:
- Zoom Cloud Recording Clips: Segments taken from full meeting recordings, saved as new clips. These are ideal for sharing specific moments from a detailed discussion or a customer testimonial from a longer session.
- Zoom Clips: Standalone, asynchronous videos you can record directly in Zoom and share instantly. Use these for quick updates, process explanations, or video memos without starting a full meeting.
For repurposing meeting content, cloud recording clips are most relevant, as they let you mine long-form discussions for the best moments.
AI Companion: Highlights and Smart Recordings
Zoom's AI Companion can auto-detect highlights and generate:
- Meeting summaries—text overviews of discussion topics. These are especially useful for meeting minutes or follow-up emails.
- Highlights—key moments, suggested by AI based on participant engagement, keyword frequency, or emotional tone. For instance, if the AI detects applause or laughter, it may mark this as a highlight.
- Clips—you can save any highlight as a new video file, ready for further editing or sharing.
To use these features, enable Smart Recording in your Zoom account. After your meeting, go to the web portal, open your recording, and review the AI-suggested highlights. The AI Companion can identify moments such as "Key Decision Made," "Action Items Discussed," or "Customer Compliment"—making it easier to pinpoint valuable segments.
These AI-powered highlights can be further refined by the user, ensuring only the most relevant moments are turned into shareable clips. For example, a 90-minute panel discussion could yield 8-12 suggested highlights, which you can review and convert into clips within minutes.
Creating Clips from Highlights
- Find the highlight in your recording. AI-suggested highlights are visually marked on the playback timeline for quick access.
- Click Save as Clip to create a standalone video. You can edit the start and end points for accuracy before finalizing.
- Clips appear in your recording's "Clips" tab for further editing or sharing. You can also download these clips for use in external editors or content platforms.
Zoom's AI highlights speed up the process, but you can also create custom clips by selecting playback ranges manually. This flexibility allows you to combine AI efficiency with human judgment, ensuring that every important message gets the attention it deserves.
Section 4: Editing and Customizing Your Zoom Clips
Fine-Tuning Playback Ranges
After creating a clip from a Zoom recording, you can adjust its start and end times for precision:
- Open the clip in the Zoom web portal.
- Drag the range selectors or enter exact timestamps. For example, set Start at 00:12:23 and End at 00:15:07 for a concise 2 minute, 44 second highlight.
- Preview playback to ensure the clip captures the desired moment, such as a product demo or a specific Q&A exchange.
Precision editing is crucial for eliminating dead air, filler words, or off-topic tangents. Even a 10-second tweak can make a clip far more engaging and professional.
Adding Titles and Descriptions
Each clip can be named and described, which helps with organization and makes sharing more effective:
- Title: Briefly describe the key point (e.g., “Quarterly Sales Strategy”). Use clear, actionable language that communicates value at a glance.
- Description: Add context, speaker names, or tags for easy searching. For example, "Jane Doe explains the upcoming product launch timeline—ideal for marketing and sales teams." Tags can include department, topic, or project code.
Well-labeled clips are easier to find, share, and reuse. This is particularly important for organizations managing hundreds of recordings across multiple teams.
Batch Editing and Content Bundling
- Mark multiple timestamps during a webinar to batch-create clips post-event. For example, during a live event, use the Zoom chat or a notetaking app to jot down timestamps for key moments.
- Bundle several clips together for a highlight reel or training module. A 60-minute training session might yield a 10-minute highlights reel, segmented by topic or speaker.
- Use AI-powered tools like Vidulk to automate batching and generate multiple viral clips in one go. Vidulk’s batch processing can automatically detect several highlights within a single video, extract them, and prepare them for export within minutes, even from recordings over 2 hours long.
Below is a look at Vidulk’s video editing screen, which streamlines clip creation from webinars or meetings:
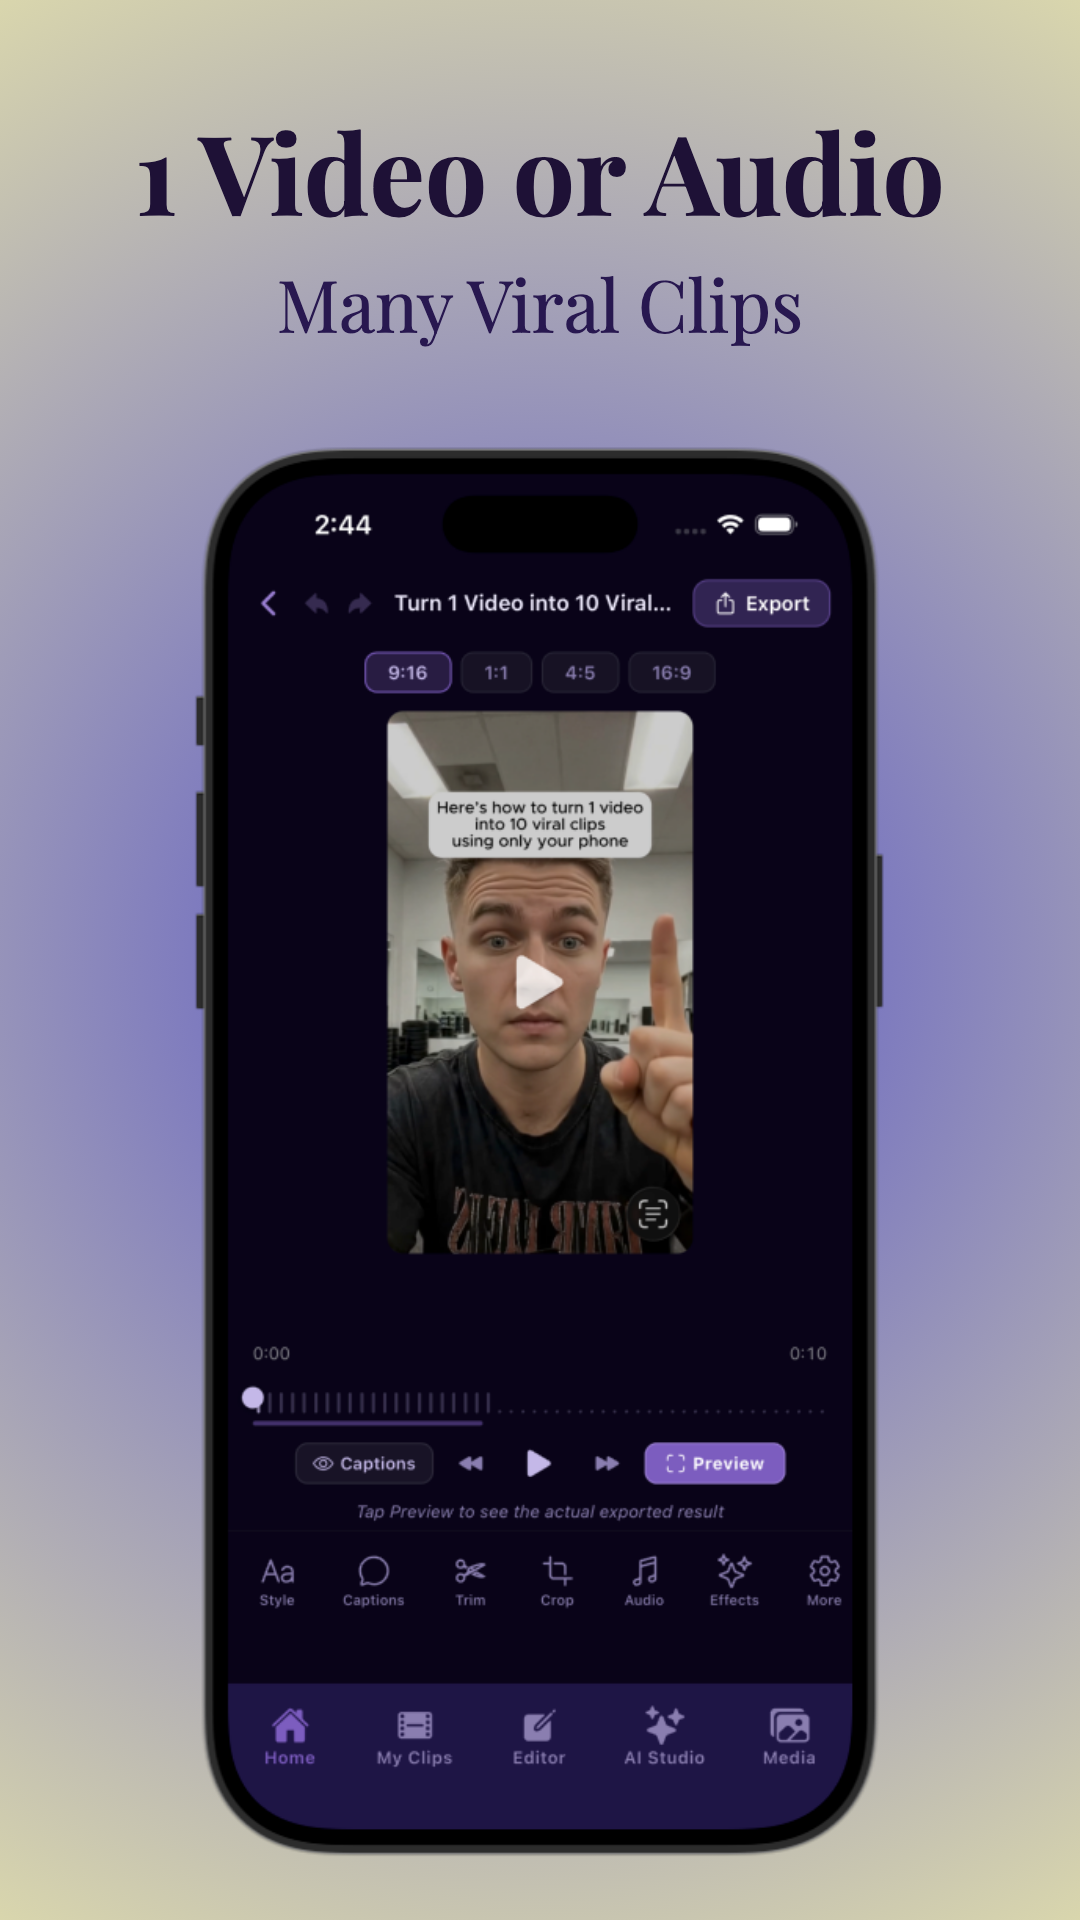
Vidulk’s editing interface provides waveform visualization, AI-suggested highlights, and quick export options for multiple aspect ratios (horizontal, vertical, square). You can add branded intros/outros, overlay captions, and even batch-export for different platforms—saving countless hours for content teams.
Section 5: Saving, Managing, and Deleting Zoom Clips
Saving and Organizing Clips in the Zoom Web Portal
All clips created from a Zoom cloud recording are stored in the "Clips" tab of that recording. You can:
- Rename, add descriptions, and tag clips for easy retrieval. For example, apply tags like “Q4 Planning”, “Customer Testimonial”, or “Product Roadmap”.
- Sort by creation date, file size, or topic. This is particularly useful when managing dozens of clips across different projects or campaigns.
- Filter by meeting or webinar to quickly find relevant highlight clips. Advanced search options in the portal can help teams locate specific content by keyword, date, or participant name.
For organizations with large video libraries, maintaining a consistent naming and tagging convention is essential. Consider creating a taxonomy (e.g., Department/Project/Topic/Date) to keep your clip library organized.
Managing and Deleting Clips
- To delete a clip, select it and click the trash icon. This removes it from active listings but retains it in Trash for 30 days.
- Deleted clips move to the Trash, where they can be restored or permanently deleted within 30 days. This safety net prevents accidental data loss.
- Batch-delete or restore multiple clips for efficient management. For example, after a project wraps, you can archive or delete all associated clips in one go.
Regularly reviewing and cleaning up your clip library ensures storage quotas are managed and only current, relevant content is available for sharing or repurposing.
File Size, Storage, and Access Times
- Clips are typically much smaller in file size than full recordings, making them easier to store and share. A 60-minute HD recording might be 800 MB, while a 2-minute clip could be just 30 MB.
- Each clip shows its creation and deletion time for tracking and compliance. This is useful for audit trails and ensuring adherence to data retention policies.
- Clips retain all original video quality and audio tracks from the source recording. No compression or loss of fidelity occurs unless you manually re-encode the files.
For content creators managing lots of meeting recording clips, consider integrating an AI-powered workflow as described in this step-by-step AI video clip guide. Automated tools can help organize, tag, and even suggest deletion of outdated clips based on usage metrics or access frequency.
Section 6: Sharing and Repurposing Zoom and Webinar Clips
Sharing Clips: Links, Passcodes, and Expiry Dates
- Each Zoom clip can be shared via a unique link. Simply click "Share" in the clip interface to generate a copyable URL.
- Set passcodes for security or restrict access to specific users. For sensitive content, share links only with authorized team members and set strong passcodes (minimum 8 characters, mix of letters and numbers).
- Configure expiry dates to control how long a clip is accessible. For example, set a clip to expire seven days after a webinar to create urgency or comply with privacy policies.
- Share directly to Slack, email, or social media from the Zoom portal. This streamlines distribution for internal communications or marketing campaigns.
Some organizations use custom landing pages for clip sharing, linking back to their own websites or learning portals for lead capture or engagement tracking.
Repurposing Clips for Social Media
To maximize reach, download your Zoom clips and adapt them for different platforms:
- Use a tool like Vidulk to add captions, crop to vertical, and style for TikTok or Instagram Reels. Captions boost accessibility and engagement—65% of viewers watch videos with the sound off.
- Bundle several highlight clips into a single video for YouTube Shorts. For example, combine three 30-second product demo clips into a single 90-second highlight reel.
- Repurpose Google Meet highlight clips and webinar segments in a similar fashion. Upload meeting recordings from other platforms to Vidulk for cross-platform editing and batch export.
- Export in multiple aspect ratios (9:16 for TikTok/Reels, 16:9 for YouTube, 1:1 for Facebook or Instagram Feed) to optimize for each channel’s requirements.
Consistency in branding—such as adding logos, branded colors, and custom thumbnails—ensures that your clips stand out and reinforce your organization’s identity.
Automating Viral Clip Workflows
AI-powered apps such as Vidulk let you paste the link or upload your Zoom recording, and the AI automatically finds the best moments, adds captions, and exports ready-to-post clips. This workflow is ideal for creators, marketers, and educators who need to turn hours of meetings into viral content fast. In practice, a content manager can upload a 90-minute recording and receive 8-12 social-ready clips with captions and branding within 10-15 minutes.
For more advanced integrations, explore how to integrate video chat APIs into your content creation process. This allows you to programmatically extract, edit, and publish clips as soon as a meeting ends, enabling a near real-time content pipeline for large teams or agencies.
Automated workflows can also include analytics—track which clips are most viewed, shared, or commented on, and refine your content strategy based on real engagement data. Many AI tools, including Vidulk, provide basic analytics dashboards for clip performance tracking.
Conclusion
Clipping Zoom recordings transforms hours of meetings, webinars, and interviews into valuable, actionable content. Whether you're trimming the start and end, creating AI-powered highlights, or batch editing webinars into viral shorts, the right tools can save you time and amplify your message. With platforms like Zoom's built-in features and third-party AI tools like Vidulk, anyone can turn meeting recording clips into engaging assets for training, marketing, or social sharing.
Organizations that use video strategically—regularly clipping and sharing meeting highlights—see faster knowledge transfer, improved team alignment, and more consistent messaging across channels. By leveraging AI-driven clipping and sharing tools, you can keep your content pipeline flowing, ensure that important moments are never lost, and maximize the return on every recorded session.
Start by identifying your most valuable recordings, trim or clip them for the right audience, and use automation to repurpose content at scale. The result: less time spent editing, more time spent engaging your audience and driving results.
FAQ
Q: How do I create a clip from a Zoom meeting recording?
A: Open your Zoom cloud recording in the web portal, use the scissors/trim tool to select your desired start and end points, then save as a new clip. For AI-powered highlights, use Zoom’s Smart Recording or upload the file to a tool like Vidulk for automatic clip creation. With Vidulk, simply upload your recording and let the AI identify and suggest highlight-worthy moments, which you can then review, edit, and export.
Q: Can I trim the middle of a Zoom cloud recording or only the start and end?
A: The built-in Zoom trim tool only allows editing the start and end. To remove a section from the middle, download the video and use a video editor or an AI clipping app for more advanced edits. Apps like Vidulk or Adobe Premiere Rush allow you to cut out any segment, add transitions, and quickly export the edited clip.
Q: What is the difference between Zoom Clips and clips from Zoom recordings?
A: Zoom Clips are standalone, async videos you record and share in Zoom. Clips from Zoom recordings are short segments you create from full meeting or webinar recordings—ideal for sharing highlights. The former is best for quick updates; the latter is suited for extracting the best parts from dense, multi-topic meetings.
Q: How do I use AI to automatically find good clips in my Zoom recording?
A: Enable Smart Recording in Zoom to get AI-generated highlights, or upload your file to Vidulk. Both use AI to scan, detect, and suggest the most engaging moments for instant clipping. AI typically looks for peaks in engagement, key phrases, or moments of emphasis from speakers to suggest the best clips.
Q: How do I share a Zoom clip with a passcode or expiry date?
A: When sharing a clip in the Zoom web portal, enable link sharing, set a passcode for access, and choose an expiry date to control availability and security. This is particularly useful for sensitive or time-bound materials, such as internal briefings or limited-time offers.
Q: Where do I find suggested topics to help me clip my Zoom recording?
A: Zoom’s AI Companion provides suggested topics and highlights in your cloud recording. Use these to quickly jump to key moments or generate clips directly from the web portal. These suggestions often appear as clickable markers on the playback timeline, streamlining the editing process and ensuring you don't overlook important moments.